Repotting is an essential part of plant care that ensures your indoor plants continue to grow healthy and strong. As plants grow, their roots can become cramped and the soil may lose its nutrients. Repotting gives plants more room to grow and refreshes their environment with new, nutrient-rich soil.
While repotting may seem intimidating, it’s a relatively simple process that can be done with the right tools and a little know-how. In this article, we’ll walk you through the step-by-step process of repotting your indoor plants, including when to repot, how to choose the right pot, and tips for making the process as smooth as possible for both you and your plants.
1. When to Repot Your Indoor Plants
Knowing when to repot your indoor plants is key to keeping them healthy. While every plant is different, there are a few signs that indicate it’s time to repot:
Signs Your Plant Needs Repotting:
- Root-bound plants: If the plant’s roots are growing out of the drainage holes or circling around the inside of the pot, it’s time to move it to a larger container. A root-bound plant will have trouble absorbing nutrients and water, which can stunt its growth.
- Slow or stunted growth: If your plant’s growth has slowed down significantly or it appears to be struggling, it could be because it’s outgrown its pot and no longer has enough space for its roots to expand.
- Soil dries out quickly: If the soil in your plant’s pot dries out much faster than it used to, it may be an indication that the roots have taken up most of the space in the pot, leaving little room for water retention.
- Watering issues: If the water tends to sit on top of the soil rather than soaking in, the soil may have become compacted and depleted of nutrients. Repotting can refresh the soil and improve water retention.
Ideal Repotting Time:
The best time to repot most indoor plants is during the spring or early summer, as they are entering their active growing season. Avoid repotting during the winter months when many plants are dormant.
2. Choosing the Right Pot
Choosing the right pot for your plant is just as important as the repotting process itself. The new pot should provide enough space for the plant to grow without overwhelming its roots.
What to Look for in a Pot:
- Size: Choose a pot that’s 1-2 inches larger in diameter than the current pot. This provides enough room for the roots to expand without being too large, which can lead to excess water retention.
- Drainage holes: Make sure the pot has drainage holes at the bottom. Good drainage prevents water from accumulating at the bottom of the pot, which can lead to root rot.
- Material: Choose a pot material that suits your plant’s needs. Ceramic pots are heavy and hold moisture well, while plastic pots are lightweight and tend to dry out faster. Terracotta pots are porous and allow for good air circulation but can dry out quickly.
- Shape: Choose a pot that is slightly deeper than it is wide. This helps prevent water from sitting on top of the roots and encourages deeper root growth.
3. How to Repot Your Plant
Now that you’ve identified when to repot and chosen the right pot, it’s time to get to work. Follow these steps for a successful repotting process:
Step-by-Step Guide to Repotting:
- Prepare the new pot: Ensure the new pot is clean and has drainage holes. If it’s an old pot, clean it thoroughly to prevent disease or pests from spreading to your plant.
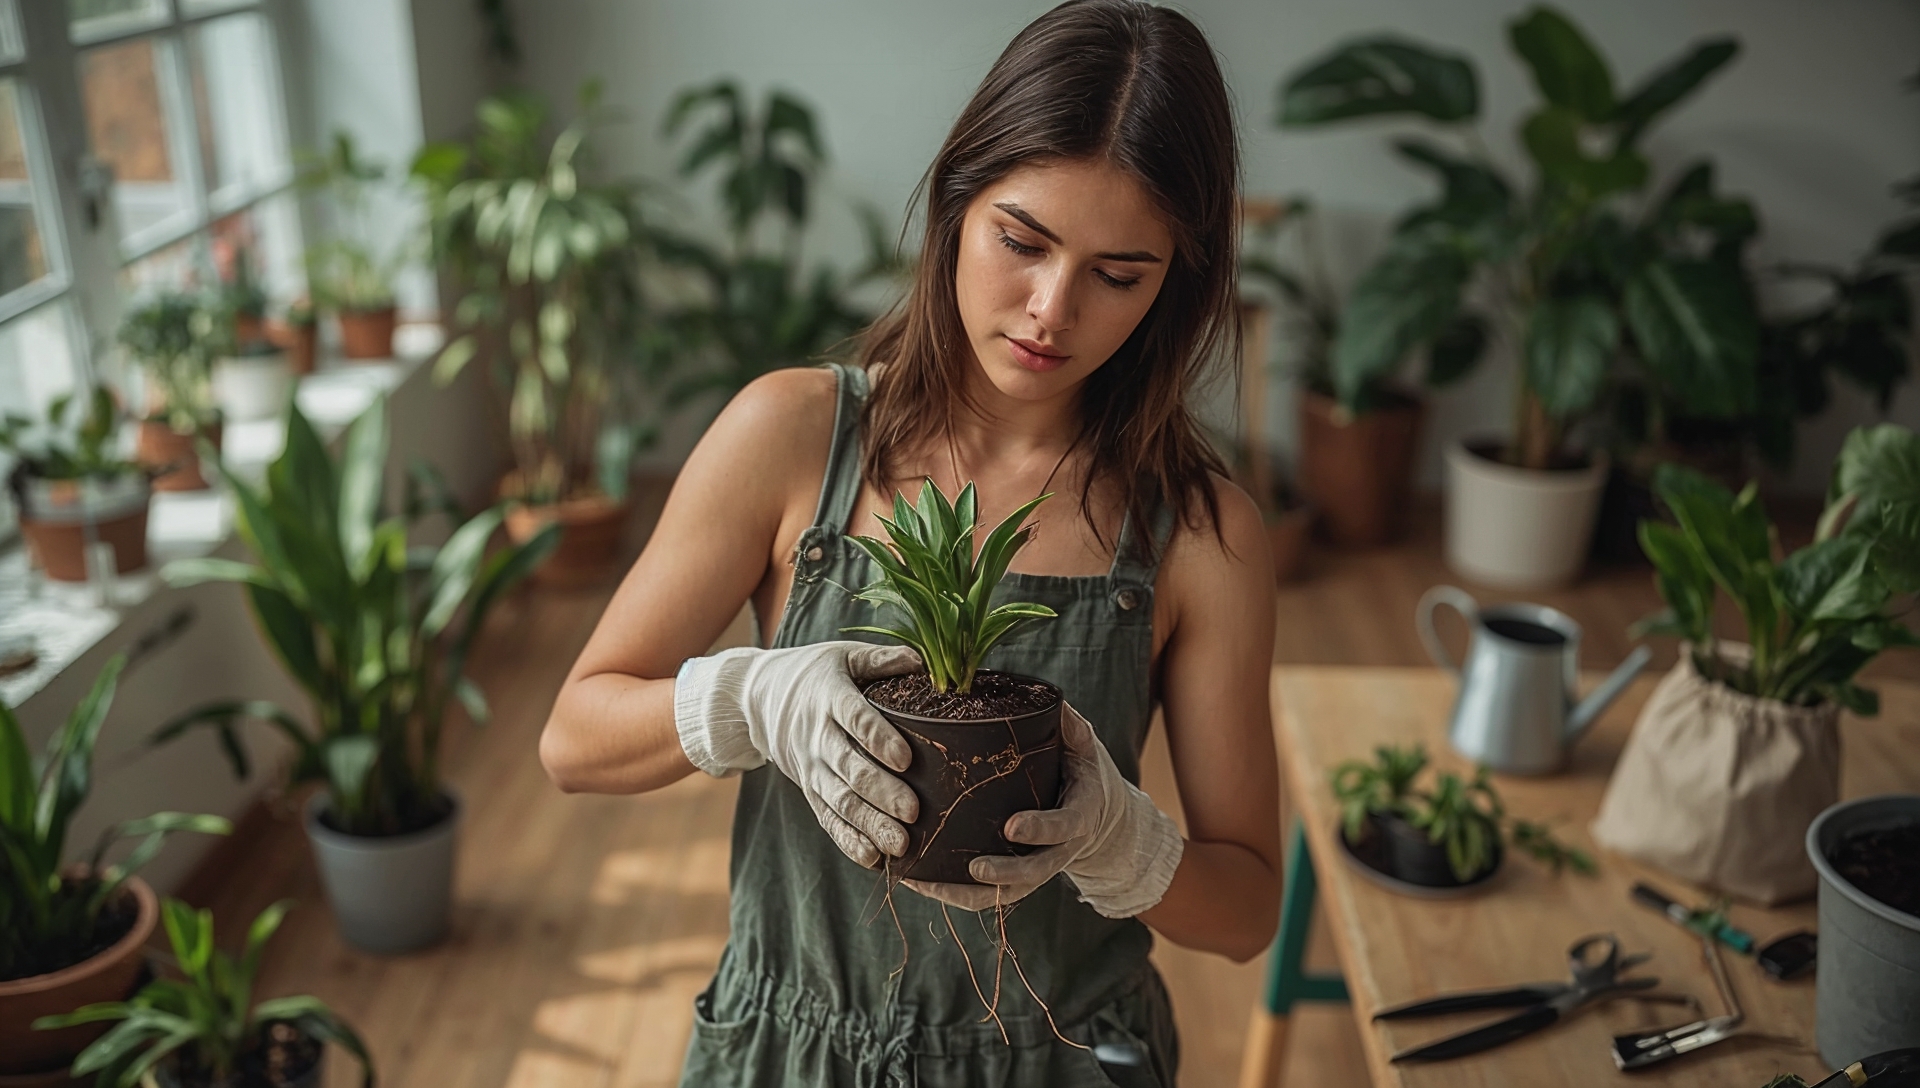
- Remove the plant from its old pot: Gently squeeze the sides of the old pot (if it’s a plastic pot) to loosen the soil. If the plant is stuck, run a knife around the edge of the pot to help free the root ball. Be careful not to damage the roots.
- Inspect the roots: Once the plant is out of the pot, check the roots for any signs of rot or damage. Trim any brown, mushy roots with clean, sharp scissors or pruning shears. If the plant is root-bound, gently tease the roots apart or make a few vertical cuts to encourage new root growth.
- Add fresh soil to the new pot: Place a layer of fresh potting mix in the bottom of the new pot. The amount of soil you add should elevate the plant so that the top of the root ball sits about an inch below the lip of the pot.
- Place the plant in the new pot: Set the plant in the center of the pot, ensuring it’s positioned straight and centered. Add more soil around the root ball, gently pressing down to eliminate air pockets. Leave about 1 inch of space at the top for watering.
- Water the plant: After repotting, water the plant thoroughly to help settle the soil and reduce transplant shock. Ensure the water drains out of the bottom of the pot.
- Place the plant in a suitable spot: Place your repotted plant in a location with appropriate light conditions. Avoid direct sunlight immediately after repotting, as the plant may be stressed.
4. Post-Repotting Care
After repotting, your plant may experience some transplant shock, which can cause it to wilt or show signs of stress. This is completely normal and should resolve in a few days to a week.
Post-Repotting Tips:
- Don’t fertilize immediately: Wait for about a month before fertilizing your plant after repotting. The fresh soil contains nutrients that the plant can use.
- Water carefully: Keep the soil moist, but not soggy. Overwatering can lead to root rot.
- Be patient: Give your plant time to adjust to its new environment. It may take some time for the roots to settle into the new pot, but with proper care, it will start to thrive.
5. Common Repotting Mistakes to Avoid
To ensure a smooth repotting experience, be mindful of these common mistakes:
- Choosing too large a pot: A pot that’s too big can cause the soil to stay too moist, leading to root rot.
- Not checking for drainage: Always ensure that the new pot has drainage holes to allow excess water to escape.
- Overwatering after repotting: Avoid watering your plant excessively right after repotting. The fresh soil will retain water more efficiently than the old soil.
- Repotting too often: Only repot when necessary. Frequent repotting can stress the plant and disturb its root system.